Based on the recipes I found, I realized that my take on Hamburger Macaroni might not be exactly the traditional. But I wanted it the way I always THOUGHT it would, or should, taste like. Flavorful, a little cheesy, a little spicy, and hearty. So I took the best of the recipes I had found to use as a guide and put together this: The Perfect Hamburger Macaroni.
Sunday, August 1, 2010
Living Up to My Expectations: The Perfect Hamburger Macaroni
Based on the recipes I found, I realized that my take on Hamburger Macaroni might not be exactly the traditional. But I wanted it the way I always THOUGHT it would, or should, taste like. Flavorful, a little cheesy, a little spicy, and hearty. So I took the best of the recipes I had found to use as a guide and put together this: The Perfect Hamburger Macaroni.
Monday, June 21, 2010
As Good As Dessert: Strawberry Cheesecake Stuffed French Toast
Plus your more inclined to follow up with something active, which is always nice following a big meal. It also doesn't hurt that I live in a neighborhood with almost universal mimosa specials all weekend.
One of my biggest breakfast weaknesses has become french toast. But not just ANY french toast, not your average french toast. Fancy french toast is what calls to me.
Crunchy french toast. Stuffed french toast. Banana bread french toast. When I see items like this on the menu I am helpless. I cannot resist. I must have it.
So when making a mimosa brunch at my place, I knew I wanted to put a great french toast dish on the menu. Originally I planned to make a cinnamon baked-style french toast. But checking out recipes, nothing called to me. And then I got inspired-
French toast, stuffed not with simple cream cheese but cream cheese dressed up to resemble cheesecake. And topped with a delicious strawberry spread. And made with sourdough bread, because I love the way sourdough french toast balances sweet topping. (It's the only french toast I will ever top with syrup.)
It's safe to say we were all glad I thought up this little concoction. They were delicious. I only made 4, so there was leftover filling and topping. That worked out great the next day spread on some croissants.
Tuesday, May 11, 2010
Veggie Taco Filling
And one thing I have been wanting to work out a recipe for is a veggie taco filling. Diced up veggies and beans, sauteed and taco seasoned. I made a couple of half hearted attempts awhile back, but never really came up with anything that I was especially happy with. Mostly because I was being lazy about spices.
Wednesday, April 14, 2010
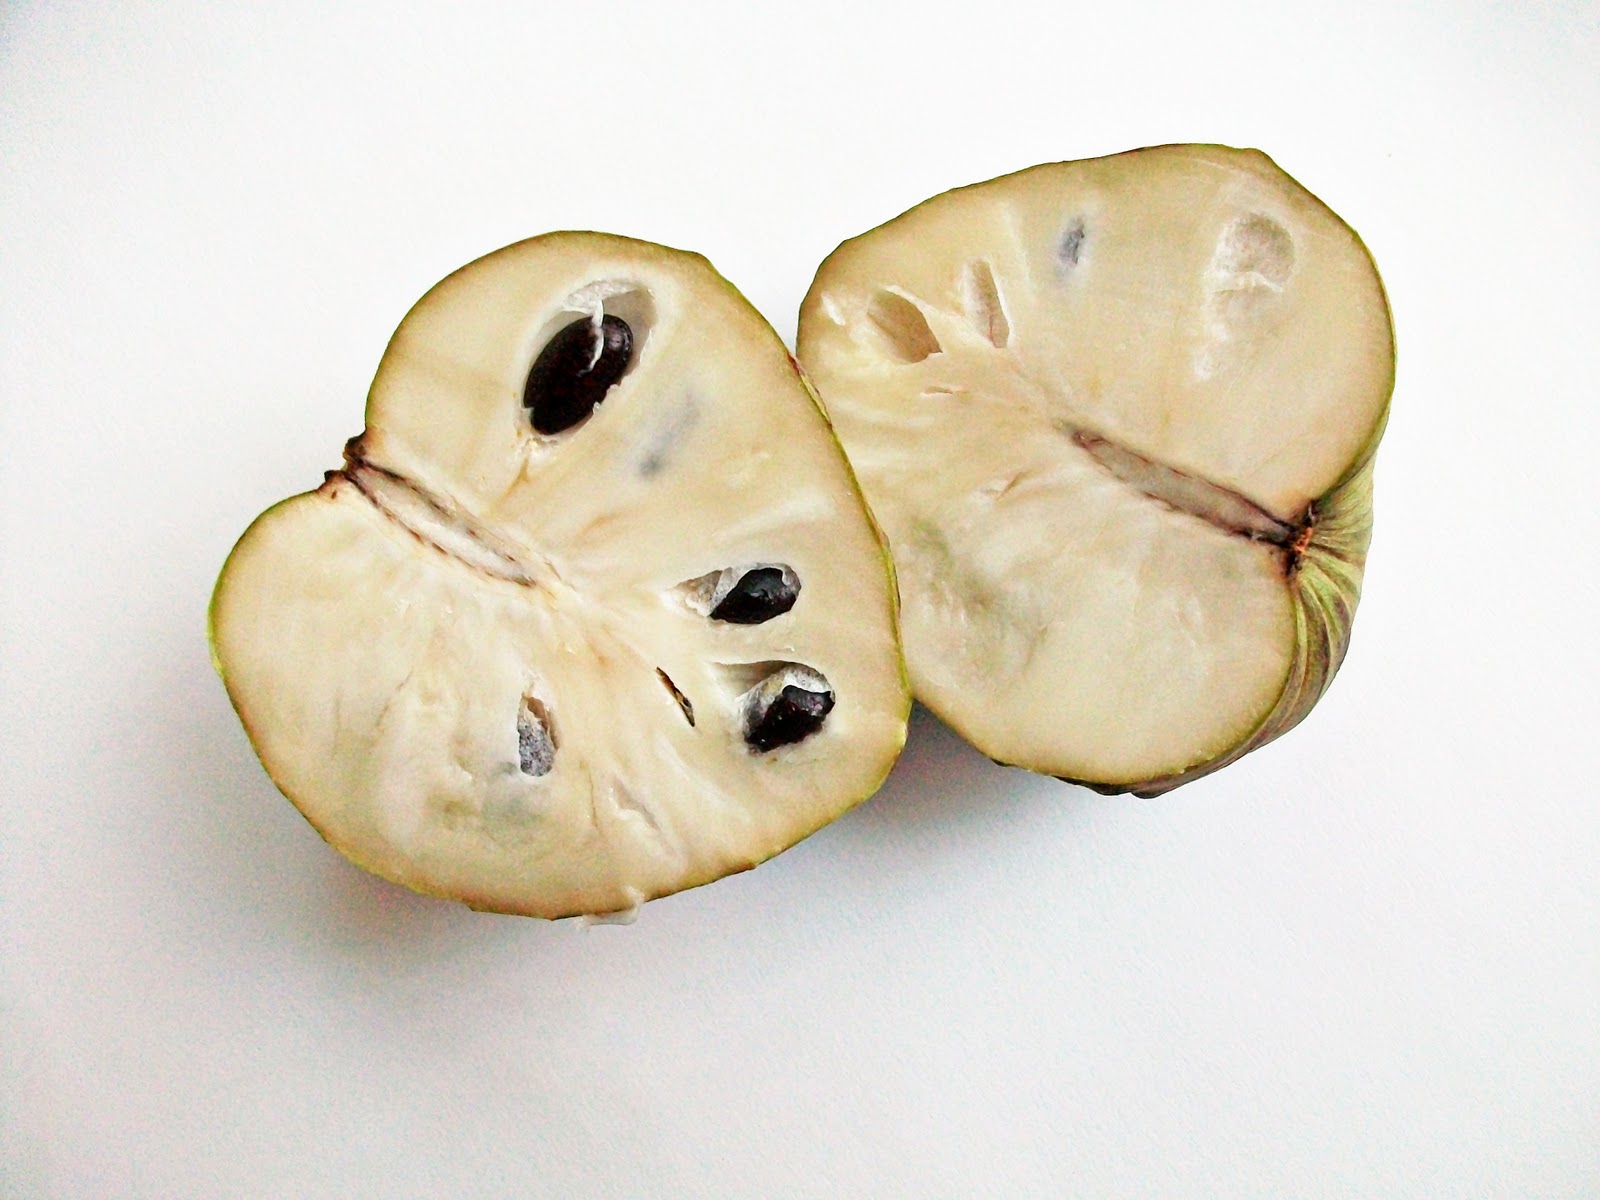
Cherimoywhaaa? Cherimoya Pie
Cherimoya Pie (seems to be the standard recipe, found on many cherimoya recipe websites)
1lb. Cherimoya (about 1 and 1/2 large cherimoya for me) seeded and pureed until smooth
3 Eggs, separated
1 cup Evaporated Milk
1/2 cup Sugar
1/2 tsp Vanilla
1/4 tsp Nutmeg
1/8 tsp Salt
10 inch deep dish pie shell
Line deep dish pie plate with crust. Bake at 450 degrees for 5min. (These are the original directions, which I followed. Based on my experience I recommend a standard par bake until the inside is golden brown. Directions are provided in My Cherimoya Pie Recipe)
However you bake your pie shell, set your oven to 375 when you are done.
Whisk egg yolks, evaporated milk, sugar, vanilla, nutmeg, and salt into the pureed cherimoya.
Beat egg whites just until soft peaks form. (Do not do this until just before you are ready to use them, or they will fall.)
Fold beaten egg whites into fruit mixture until combined and no white streaks remain. Resist the urge to stir! Have patience, keep folding. When combined pour mixture into pie shell.
Bake at 375 degrees until a knife inserted in the center comes out clean. The custard will puff up and turn golden brown on top. The recipe I used said this should take about 35 min but it was much faster for me (I'm talking 15min, yikes!). This could be a symptom of ghetto oven, so watch yours closely.
Despite my concerns after it cooked so fast, this pie came out alright. The crust was a bit undercooked, hence my suggestion to pre-bake the bottom crust.
The filling came out pretty good. This pie was very light and fluffy. I cannot emphasize this enough- VERY FLUFFY. And some people really liked that. I thought the texture was fine, it was the incredibly light flavor accompanying it that I was less excited about.
Luckily, I had more cherimoya to use up so I decided to make another. This time I opted to make it using a recipe similar to a traditional pumpkin pie, in the hopes that this would produce a more dense custard with a more pronounced flavor to go along with it.
My Cherimoya Pie
2 cups pureed Cherimoya (from 2 large cherimoya)
1/2 cup Sugar
2 Eggs
14.5 ounce can Evaporated Milk
2 Tbsp Flour
1/8 tsp Salt
1 tsp Vanilla
1/4 tsp Nutmeg
1 pie shell
Pre-bake pie shell. Poke holes in the crust, line with foil and weights and bake at 375 for 20 min. Remove foil and weights, then continue baking until inside of shell is golden brown.
I used my 9-1/2" pyrex pie dish, and it worked well. This does not make enough filling for a deep dish pie, but there may be some filling left over if you use a standard 9" pie plate. Just fill it with as much as you can.
Beat together pureed cherimoya, evaporated milk, eggs, sugar, nutmeg, vanilla, salt, and flour.
Bake at 375 until a knife inserted comes out clean, approximately 25 min. The filling will puff up above the pie crust, but settles when it cools. The top will turn a light golden brown.
My results:
This pie was more dense then the original recipe produced, but still significantly lighter then a typical pumpkin pie. This must be the way the fruit cooks, but I may try reducing the recipe to one egg in the future to make the texture even more dense.
I felt this method did enhance the flavor somewhat. It still was quite light, but I was happier with what this produced. It tasted good, but I'm not sure it is as good as simply eating the fruit raw.
And at least one person compared it to cheesecake, THAT certainly isn't a bad thing.
Sunday, February 21, 2010
Pear Lovers Pear Pie
It was my second pie. And my third, fourth, and fifth. Maybe sixth too, I can't remember. And I was never even really happy with it.
I didn't know all the things I know now. I believed that I couldn't par bake with a top crust. I had never even heard of using tapioca as a thickener. I simply didn't know how to prevent a soggy bottom.
To top it off, all the recipes I found were for “apple-tasting” pear pie. And it didn't make much sense to me to try so hard to make a pear pie if it was just going to taste like apple, which came out better with a lot less effort if I just used apples. So I hit a point where I couldn't improve it anymore and moved on.
But in a year of pie baking I had learned a lot. So I thought about trying again this year. I was pretty sure I knew how to get it to thicken up right this time. But I put it off for awhile because it still seemed pretty silly to put so much effort into a pear pie if it was just going to taste like apple.
I looked thru different recipes but they all seemed to be similar to the first one I tried or be combination pies that included a lot of other things I expected might overpower the pears and what I wanted was a pear pie that tasted like pear.
Finally, it dawned on me that the reason so many pear pies taste like apple is because they are flavored just like an apple pie. Cinnamon, nutmeg, lemon, and butter. I decided it would be better to make a pie that was seasoned to bring out and accent the pear flavor, instead of overpowering it. So I thought probably just cinnamon and vanilla would be best.
Attempt #1
(This attempt was pretty much futile. I knew I needed to thicken this pie with tapioca, but I was out and feeling too lazy to go get it, so I went without. Talk about setting yourself up.)
6 cups Bosc pears, peeled and sliced (about 6 pears)
1 tsp cinnamon
1 tsp vanilla extract
1 cup sugar
¼ cup flour
Mix together sugar, cinnamon, flour. Toss with pear slices. Sprinkle vanilla over top, and mix to better combine the flavor.
Roll-out and par bake bottom crust until inside starts to turn golden.
Fill with pear mixture.
Cover with top crust.
Bake at 425 for 20 min, then lower to 375 and continue baking until thick and bubbly.
Results: I could tell during the baking process that the filling was not thickening as much as I had hoped, and the final product did have a soggier-then-desirable bottom crust. The filling wasn't too loose and liquidy though.
On the bright side, I was pretty happy with the flavor. It certainly tasted like pear.
Attempt #2 – Final version
6 cups peeled and cubed Bosc pear (about 6 pears) (peeling is optional)
½ cup sugar
2 Tbsp instant tapioca
1 Tbsp flour
1 ½ tsp cinnamon
1 tsp vanilla extract
Milk to glaze top crust
Roll out bottom crust and line pie plate. Refrigerate for 15 min before baking.

Poke holes throughout crust with a fork. Line with foil and fill with pie weights. Bake at 375 for 15 min. Remove foil and weights, continue baking until the inside starts to turn golden.

Meanwhile, toss pear cubes with tapioca, sugar, flour, cinnamon, and vanilla. I prefer cubes to slices when baking with tapioca because the pearls will blend in better then it does with slices. Let the mixture sit for at least 15min before baking to soften the tapioca.
This much sugar produces a mildly sweet pie. If you prefer a sweeter pie, use a whole cup.

Fill par baked crust with pear mixture. It's best to work quickly once fruit is in the crust so it stays crisp.

Roll out top crust.
I find a good strategy for when you want to par bake the bottom but still have a top crust is to cut out shapes and then lay them decoratively over the filling. This method doesn't require sealing the two crust halves at the edge.
In this case I cut out circles. Placed them on a plate to re-chill in the fridge before covering the pie; this makes them easier to work with.

I arranged the circles in a decorative pattern over the fruit, sealing overlapping edges with a little milk.
Brush milk over the top of the pie. Sprinkle with sugar and cinnamon. (I've really been starting to get fancy, huh).
Make decorative venting slits in top.

Bake at 425 degrees on the bottom oven rack for 20 min. Lower to 375 and continue baking until filling is thick and bubbling, about 30 more min.

Results:
This pie came out fabulous. The filling was perfectly thickened and the bottom crust didn't get soggy. I made some minor adjustment to the filling spices and I was happy with the flavor. I really love how it actually tastes like pears!

Tuesday, February 16, 2010
I Miss Pizza Luce: Baked Potato Pizza
You Can't Replace Food
When you move or a favorite restaurant closes you can find new foods to love, but you can never replace what you have lost. You will always remember those dishes. Always want them.
I learned a new one this week:
SOMETIMES (the sometimes is important) you can recreate them
I moved from Minneapolis to San Diego. I ate out A LOT, so there are a lot of foods I miss and I can't even come close to fitting all of them in on any given visit. One place that I will always miss is Pizza Luce. Their food, all of it, was delicious. Pasta, pizza, sandwich's, dessert. And they DELIVERED. But of all their super duper good items the one I ordered the most, the one I miss, the one I cannot replace is the Baked Potato Pizza.
Really good pizza crust topped with mashed potatoes, broccoli, tomatoes, cheese, and then spread some sour cream on it when you eat it – it's amazing. So I decided to try and make it myself.
I'm not gonna lie, the first time did not work. But I got it. So let me share.
Ingredients:
1 ½ cups Mashed potatoes (about 1lb. If you are making them just for this)
1 cup broccoli
½ cup chopped tomato
1 cup shredded cheese, I like cheddar for this
your favorite pizza dough
Sour Cream for topping
How To:
Make your favorite pizza dough, or take it out of the package if your scared of yeast like me. I bought mine at Trader Joe's. Don't judge me, I make pie crust.
Roll out to about 12”, building up the edge a bit for the crust. Poke holes all around the middle with a fork.

Bake as directed until the center just starts to turn golden brown. I really recommend using a sheet with holes in the bottom or a baking stone if you want a crispy bottom. And check it about half-way through. If the holes baked closed and your crust is all puffed up, poke it a few more times with a fork.
Meanwhile, steam the broccoli 10-12 min until it is soft.

When the crust is done spread the mashed potatoes evenly over the center.
If you need to make some, a basic recipe is fine. I simply diced my potatoes and boiled until soft, then mashed with 2 Tbsp sour cream and a couple splashed of milk until they were smooth and creamy.

Sprinkle broccoli and tomatoes over the potatoes.

Cover everything with cheese.

Continue baking until the cheese is melted, about 10-15 minutes.

I might not be remembering the real thing correctly, it has been over a year since I last had Pizza Luce's Baked Potato Pizza, but this really hit the spot for me. This is one less food I have to miss and I couldn't be happier with the results.

Thursday, February 4, 2010
I'm An Options Girl. Fruity Soft Cookies, 2 ways.

I had some leftover pineapple and coconut, so I got this idea to make some soft cookies filled with with pineapple, coconut, and cherries- I added the cherries cuz I thought they'd be really cute topped with little maraschino cherries.
The only problem I had was it took a bit of searching to find one that didn't rely on shortening or margarine to make soft cookies. I feel strongly about baking with 100% butter whenever possible, because IT HAS FLAVOR. Shortening does not have flavor, so it just seems like a waste of calories to me. (And no, I will never stop commenting on my dislike of shortening whenever it comes up).
According to my research, butter tends to make a crispier cookie. But you can still get soft cookies with butter if you balance it with some egg. But even following this reasearch, I just didn't feel confident enough in my cookie abilities to wing it (I mean, I haven't made cookies in about 2 years. And those were the cake mix kind).
Luckily I found this pineapple cookie recipe that was 100% butter, so I went with that recipe and just jazzed up the mix-in's a bit.

It made a ton of cookies.
And when I was done, I decided I thought they would be really good with a chocolate cookie base. So I found this recipe and adapted it to suit my fruity mix-ins.
Ingredients: Chocolate Cookie White Cookie 1 1/4 cup butter, softened 1 cup butter, softened 2 eggs 2 eggs 2 cups sugar 1 cup sugar 1 cup packed brown sugar 2 tsp vanilla 1 tsp vanilla 1 tsp baking soda 1½ tsp baking soda ½ tsp salt ½ tsp baking powder ¾ cup unsweetened cocoa powder 4 cups flour 4 cups flour For Both: ½ cup canned pineapple, drained 1/3 cup maraschino cherries, chopped (plus approx. 36 whole ones for topping cookies) 1 cup sweetened coconut flakes
Method:
Preheat oven to 400°
Combine softened butter, sugar, and eggs and beat until smooth.

Add salt, baking soda, & vanilla and baking powder or cocoa powder. Mix thoroughly.

Add flour 1 cup at a time and combine. The dough will become VERY thick and dry. If it is too thick to work with reserve last cup until after mixing in the fruit.
People with stand mixers are very lucky at this point. I am not one of those people.

Chop the pineapple chunks to desired consistency. I chopped them pretty fine for one batch of cookies, and then left them in bigger chunks for the second batch because I thought it was too subtle. Both ways worked fine. I like it chunkier, but go with your personal preference.
Combine into cookie dough with chopped cherries and coconut flakes.

Dough will be much more moist after mixing in the fruit. If it is too sticky to work with put it in the fridge for about 10min before spooning it out and it will be much easier.

Use a medium scoop or spoon to make approx 2 Tbsp sized balls You should get about 36 cookies.
Place on cookie sheet (I rubbed a little butter on mine to prevent sticking.)
Make indent in the top of the ball with your finger and place whole cherry.

Bake at 400° for 8-10 minutes or until done. The white cookies will be golden over the top when they are finished.
The Verdict: The cookies came out very well and co-workers gobbled them up, a good thing since I had so many. They were just as I envisioned them, perfectly soft (almost cake-like) with bits of fruit. I am more of a crunchy cookie girl, but I enjoyed them thoroughly and declare them a must-bake for soft cookie lovers. I will hold onto this recipe.