Thursday, December 31, 2009

Fruit of the Gods: Persimmon Pie

Although New Years hasn't passed us up yet the Holidays are over in my opinion. And the back-log of things I wanted to write about cooking is just beginning to be taken down by this post. There were so many things I wanted to try to make and to write about, that I had no time for the writing while some potential masterpieces were simply disasters that may never be re-visited.


But I will start here. With one simple pie that didn't give me any trouble. Persimmon Pie.


I am a little fascinated by persimmons. They don't really have a footing back home in MN. Even after spending 3 years working at a grocery store in high-school and being pretty sure I had seen every piece of produce possible I did not recognize them.


But in the fall, the Whole Foods here seems to have an abundance of the Fuyu variety. I did not recognize them, so I had to buy some. And I liked them! Really liked them. They are not like any other fruit I can think of, the closest is maybe papaya?


So I discovered them last year and they were gone before pie-baking even got started for me. So this year I HAD to make pie with them. Most of the pie recipes I found used very ripe persimmons, when the inside becomes a pulp, creating a custardy pie. People eat them like this too- but I never have. I eat them when they still feel very firm and can be sliced, and thats what I wanted to make pie with.


But with a little digging I found this recipe, using just the firm persimmons I desired.


One commenter suggested opting to peel the persimmons. I decided to do this because it made a lot of sense to me. Persimmon peels are thin but VERY tough. I never eat them and couldn't imagine I would want to in a pie either.


However, she suggested blanching and peeling like a peach. This did not work at all, and I kindof hurt my thumb on a sharp pointy edge trying to do it. I quickly switched over to simply peeling with a peeler like an apple and this worked a lot better.


Recipe*:


2 1/2 pounds firm-ripe Fuyu persimmons

1/3 cup granulated sugar

1/3 cup firmly packed brown sugar

2 1/2 tablespoons quick-cooking tapioca

1 teaspoon ground cinnamon

1/2 teaspoon grated orange peel

1/2 teaspoon grated lemon peel

3 tablespoons lemon juice

1 tablespoon butter or margarine, cut into small pieces


*These are the ingredients listed in the recipe. I forgot to buy a lemon, so I only used orange peel. But I had some refrigerated lemon juice so I used that. Also, I added nutmeg because I thought nutmeg would work well with the flavor of persimmon. And I left out the butter, because I never dot my fruit with butter.


Peel and slice persimmons into equally thick rounds.


Combine sugars, tapioca, orange zest, and spices. Toss persimmon slices in mixture. Sprinkle with lemon juice. Let sit at least 15min (for the tapioca).


Meanwhile, par-bake bottom crust. Cover edges while par-baking to keep them as soft as possible for sealing with top crust.


Fill crust with persimmon mixture. Place top crust over fruit and press edges down firmly to seal.


Cut several slits into top crust for venting.


Place pie on lowest oven rack and bake for 20min at 425°, then lower oven temp to 375 and continue baking until inside becomes bubbly (about 20-25 more minutes).


I made just two simple changes to this recipe. The first was par baking the crust. I hate soggy crust bottom and par bake just about everything. I find it is almost always necessary.


Second, I increased the temperature for the first part of baking. This also helps to prevent soggy crust bottom. I did it because I take no chances in this point.


The pie?


It came out well. I was worried about attempting to cut back on the tapioca and used the full amount but found it to be a bit heavy in the final product. If I heated the slice up it was O.K. but leftovers out of the fridge had some visible clear jelly. Never attractive. I did not notice this at room temp so maybe it is not such a problem as long as you don't refrigerate it.


The real problem in my opinion was the flavor. Not that the spices were bad...but the fruit. The potency, depth, and complexity of persimmon flavor was simply lost in the baking process. (I know it was not bad fruit because I sampled amply throughout the slicing process.)


I guess some fruits are just best enjoyed in their most basic state; fresh and simply sliced.


(Pssst...it didn't photograph that well either.)


Monday, December 7, 2009

Not Quite Stew: Italian Stew-erole AND My Very 1st Food Blogging Event


I have been meaning to make this recipe for awhile now, and I finally got around to it last week. Luckily I was just in time, because one of my favorite food blogs, Closet Cooking, is hosting a pasta event Presto Pasta Night. I just recently learned about food blogging events (from another event featuring Closet Cooking actually, but more on that another day), and I am really exciting about participating in some. Especially now that I am starting to feel that things here are coming together and my postings on this blog are starting to come out quite nice.

I found
the precursor to this recipe on A Dash of Sass. The recipe was full of things I love and if I had made it in a timely manner I might have stuck to the recipe as posted. But I was busy, and the longer it took me to make it the more I altered it in my head.

Originally, this was a stew. I thought mine would still be a stew, but there was a little too much in it. So it turned out to be an incredibly thick stew. Really, it's more like a stovetop casserole.

It's a stew-erole!


Italian Stew-erole


1/2 cup white or yellow onion (about 1/2 a med/small onion); chopped

2 cloves garlic, 3 if they are small; minced

1 Tbsp olive oil

1/2 cup uncooked ditallini (or other miniature pasta)

1/2 cup red bell pepper; diced

1 cup zucchini; diced in big chunks

15oz can cannellini beans

14.5 oz can crushed or stewed tomatoes

1/2 lb italian sausage*, bulk or removed from casings

1 tsp dried oregano

1 tsp dried basil

1 tsp italian seasoning mix

1/2 cup grated Parmesan cheese, plus more for topping

salt and pepper to taste

*I do not eat meat, I eat faux meat. But I find most recipes work fine either way, so I will include directions for either choice.


Cook pasta according to package directions. Make sure not to over cook. Set aside.


If using real sausage, cook in your large saucepan over medium heat (just like you you would ground beef). When cooked through, set aside


Heat oil in a large saute pan over medium heat.


Cook onion and garlic until onion begins to soften, about 2 min.


Add zucchini and red bell pepper, cook about 5 more min.


Add cooked sausage to pan, or crumble veggie italian sausage into pan and cook through.


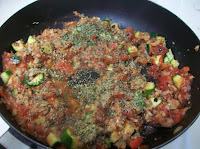
Add entire can of tomatoes, including all of the liquid. (I used crushed tomatoes, but I think stewed would have worked out better because there are more big chunks in stewed tomatoes.)


Add the basil, oregano, italian seasoning mix, a pinch of salt and pepper. Mix thoroughly.


Drain and rinse canellini beans. Mix in.


At this point I also added ½ a cup of cheese directly to the dish and stirred it in because I wanted the Parmesan flavor mixed throughout. I'm not really sure this was a good idea though, because I didn't like having all the cheese strings throughout it since there was not enough liquid for the cheese to thin out.


After the cheese was melted in the best I could get it I folded in the cooked pasta. Taste and add more salt and pepper if necessary. (I just realized red chili flakes would also be a great addition, I'm gonna add some of those next time.)


Once everything is heated serve with grated Parmesan for topping.


That was quick, right? And yes, it is as good as it looks.


Tuesday, December 1, 2009

Periodic Table of Cupcakes

I am kind of a nerdy scientist.


So, obviously, I love this.


Sunday, November 29, 2009

What Am I Thankful For: Apple Pie

Why am I thankful for apple pie? It is the first kind of pie I ever made 100% from scratch. And, luckily, it came out great. It is really the best pie for a first time baker because apples are the easiest fruit to work with. They naturally release a lot of pectin when baked, which thickens the filling and prevents a soggy crust bottom.

So I am thankful that apple pie is so easy to make. And thankful that it started such a great hobby for me.


I'm the first to admit I don't really get into the Thanksgiving spirit. I am not currently carnivorous and even when I was, these are not the foods that tend to rock my boat.

But I am not anti-social, so when I was invited to Thanksgiving dinner by a co-worker I accepted the invitation. She requested that I bring a pie, of course.


So I brought apple. Just a regular apple pie. The recipe I use is VERY GOOD. I found it here, and use it almost exactly. But with the addition of a bit of nutmeg. I also choose to measure the amount of cut up apple instead of just basing it on the number of apples, because apple sizes vary so widely.

And since it was a special occasion, I decided to make it pretty.


RECIPE:

5 cups sliced and peeled tart apple (I use all granny smiths)
1 cup sugar
2 tablespoons flour
1 tablespoon apple cider vinegar
1/2 teaspoon cinnamon
1/2 teaspoon nutmeg
1/4 teaspoon salt


Combine all dry ingredients


Add apple cider vinegar and mix until thoroughly
combined


Add apples (If you toss them into the sugar mixture as you slice them, they won't turn brown. But really, for baking purposes, it doesn't matter if they turn brown.)

Fill standard 9" pie shell with apple mixture. Top with second crust, pinching edges together and make five 1" venting slices in the top crust.
(Or this is a great pie for a lattice crust.)


Cover the crust edge. Bake at 400 degrees until the filling is thick and bubbling, ~60 minutes.


I was actually a little short on granulated sugar, so I used about a tablespoon of brown sugar. Some people like to even use half white, half brown. I'm personally not a huge fan of molasses, so I stick to mostly white, but the flavor was good with a bit of brown mixed in.


Also, although I did bake it until it was bubbling I could see thru the lattice crust after it had cooled a bit that the filling was not as thick as I like it, it still seemed a bit watery. So, I heated up the oven again and baked it some more, until I thought it looked thicker.


I wasn't sure about doing this, but it worked out just fine and the pie tasted great. It looked pretty nice too!


Tuesday, November 24, 2009

This Pies For The Grown-Ups: Cayenne Spiced Pumpkin Pie

It may look like your typical pumpkin pie. But it's not. It's better then that.


Because I had this great idea, it was probably sub-consciously inspired by the potatoes, to put some Cayenne pepper in pumpkin pie.


I know, it can sound weird. But think about it – not too much, just a subtle amount of cayenne...with pumpkin...and cinnamon. Well, lots of people didn't believe in the idea, but I knew it would be good.


So I decided I would start with a basic pumpkin pie recipe that included plenty of cinnamon. Take out all the other spices, and just add the cayenne pepper a little at a time until it seemed to taste right.


So I started with:


1 15oz can of pumpkin (because canned is fine)

1 12oz can of evaporated milk

2 large eggs

¾ cup sugar

2 Tbsp flour

1 tsp cinnamon


And here is where I added some cayenne pepper, tasted the mix, added some more...finally settled on ½ tsp cayenne pepper.


I filled up a par-baked pie crust (because pumpkin pie filling is like water so if you don't par-bake the crust it WILL be moist).


I baked this for 15min at 425°, then turned the oven down to 350° and baked for another 30 min. And it was perfect, beautiful, the second time.


I learned an important lesson the first time I made this. People who say they use graham cracker crusts for pumpkin pie are idiots.


It's a liquid! And ground up crackers are not strong enough for liquid!


But the first time I made this I was a little burnt out by the typical crust, because I had been making a lot of them, and I wanted to do something different. So I put my trust in these reports. And it was a mess. Even with pre-baking it was a thick, soggy, cake-y layer sitting below my pumpkin creation.

I couldn't even decide for sure if it was good.


So I made it a second time, using the appropriate crust. And it most certainly IS good, although I will be the first to say this pie will probably not be appreciated by everyone. But those who do appreciate it, they will love you for it.

Anythings Game Now: Cheesy Spicy Mashed Potatoes

I mentioned before that I was not sure what to do with this blog; whether or not I wanted to expand its scope outside pie.


I have been putting together a number of recipes lately for Tasty Kitchen, and one food came along and made the decision for me.


I created these mashed potatoes. They taste amazing, are easy to make, and need to be shared with as many people in the world as I can possibly reach.


They include the two best ingredients on the face of the planet: cayenne pepper and cheese. Mixed in with one of that which I will hereby name The Cream Dyad: sour cream.


I thought of these potatoes, and then thought about them for weeks waiting for the opportunity to make them. They were all I hoped they would be. It is so satisfying to not be disappointed by dreams.


The Potatoes:


The Recipe

(Makes 4 Servings)


1lb Potatoes

4 Tbsp Sour Cream

1 tsp Cayenne Pepper

1½ cups shredded Sharp Cheddar Cheese – the sharper the better and I recommend orange colored cheese to give potatoes that “yes, I am cheesy” hue.

Milk (a splash may or may not be needed)


Scrub potatoes and peel if desired. Cut into 1″ cubes.


Bring a pot of salted water to a boil. Boil potatoes until soft, about 15 minutes. Drain.


Start mashing potatoes, going until you have achieved a rough lumpy mash using whatever method you

prefer. (I just use a pastry cutter and a fork).


Thoroughly mix in sour cream. If the potatoes are not creamy enough, add a splash of milk and stir to combine.


Stir in cheese, adding it in batches of 1/4-1/2 a cup at a time. Keep stirring until completely and evenly combined.


Add cayenne pepper and stir. (This much pepper will produce a mild level of heat for spice aficionados while still preserving the cheesy flavor, so scale back a bit if this is too much for you.)


Creative leftover idea:


I had a bunch of these to enjoy a second night, and wanted to do something different with them. So I made my favorite mashed potato dish – potato tacos!


I stuffed them into flour tortillas, folded in half and broiled to get the tortillas warm and a bit crispy. Then I topped them with some more sour cream, shredded lettuce, and tomatoes.


It was Yummy. But warning, as with all things cayenne spiced, they got hotter with time.


Monday, November 23, 2009

Pumpkin Showdown : Pumpkin Pie

It's been A-WHILE, I know... Work got crazy. But not so crazy that I didn't find time for a few pies! Just no time to write about them.


But I will make up for it now with this ridiculously long post about pumpkin pie. (Seriously, this should be divided into two separate entries and would be if I had stayed on top of things.)


I have been really looking forward to making pumpkin pie using fresh pumpkin so as soon as I saw them at the store I bought four. You've seen the picture.


Pumpkin pie is not generally made with jack-o-lantern pumpkins (although you CAN do that, you just might want to add extra sugar); most people use smaller pumpkins labelled as pie or sugar pumpkins. They are apparently sweeter and less grainy. I say apparently because this what everyone says but as you will learn if you make it thru this ridiculously long post “everyone” is sometimes wrong and I have never actually cooked a jack-o-lantern pumpkin for any reason.


After purchasing these I did a little research to figure out how exactly I should go about this. I found this site to have lots of information and pictures and sort of used it as my guide. I also found some fresh pumpkin pie recipes at allrecipes.com.


First, you need to cook the pumpkin. It doesn't really matter how- steam it, microwave it, bake it. Whatever. There seemed to be some concern in my sources about drying it out so some directions called for baking or microwaving it in a bowl of water, but I thought that was a bit odd since one thing to keep in mind when baking with fresh pumpkin is that it tends to be more watery then the canned.


Me, I just baked it on a baking sheet until it was soft. Mostly because my microwave is way too small to fit a pumpkin and I do not have a put or steamer big enough to steam it. Despite some recent acquisitions my kitchen is still approx. 85% ghetto so I have to work with what I've got. This worked fine and did not dry it out. But steaming it is probably the fastest way to cook it. When it id done it will be totally soft and fall of the skin when spooned out.


At this point it needs to be pureed. Again, you can do this however works for you- blender, food processor, potato ricer, etc. I used my food mill and it worked out great.


Voila! You have fresh pumpkin.


Fresh pumpkin CAN be a little watery. I found two ways of dealing with this. #1, you can set up this little contraption with a pice of cheesecloth over a fine strainer suspended over a bowl. An hour or so seemed to be enough to remove most of the excess water. #2, and especially good for the minimalist kitchen, let your pumpkin sit in a bowl for a bit. If there is excess water it will be pushed out to the sides and there will be pure water surrounding the edges of your pumpkin. Place a paper towel at the edge and it will soak most of it up.


Here is also where I ran into my first problem. That helpful website, and many of the recipes I found, called for 1 pie/sugar pumpkin and gave the impression that it would yield plenty of puree. I did NOT find this to be the case. I realize there are different pumpkin sizes but since this experience I have looked around and have yet to find one big enough to do the job. Maybe it is just the area where I live that can't produce these mammoth pie pumpkins, but I always needed 2 – and this usually produced just enough for one standard 9” pie. For reference, a standard size pie should have 1 ¾ – 2 cups pumpkin, with 1 ¾ being the equivalent of a 15oz can.


So I cooked and pureed ANOTHER pumpkin. And then I had 2 cups. So I made the recipe at the website posted and scaled everything down because it uses the 3 cups(!) it claims will be produced by one of these pumpkins.


(I realize some of these measurements are a little weird, thats because two-thirds-ing a recipe is weird).


2 cups pumpkin puree

2/3 cup sugar

1 tsp cinnamon

2/3 tsp ground cloves

2/3 tsp allspice

~2/3 of ½ a tsp ground ginger

pinch of salt

2 extra large eggs

1 12oz can evaporated milk


1. Combine all ingredients

2. Pour into unbaked 9” pie shell

3. Bake at 425° for 15min, then lower to 350° and bake until knife inserted comes out clean, about 45-60min

Note: Canned pumpkin was heated on the stovetop and then allowed to cool before using. Why? Because I read in someone's comments on a recipe that doing this makes canned pumpkin taste better. I'm not sure if this is true, I haven't done a showdown for it yet, but I figured I had to give the canned pumpkin its best shot, so the safest thing to do was include this step JUST IN CASE it does make a difference.


And I was sooo excited for this pie, I didn't even care that I had to cook the pumpkin twice. Everything I read said that canned pumpkin does not even compare to fresh. (One source even mentioned that canned pumpkin is not made with pumpkin, but I think they are wrong because I checked the ingredients on a can and it listed just one thing: pumpkin.) I've never met a pumpkin pie I didn't like and I am pretty sure I never had one from fresh before, so I expected this to blow me away.


But it didn't. Don't get me wrong, it was good. But it didn't really taste significantly different from any other pumpkin pie.


(And...the crust was soggy. I tried to trust the recipe, even though the filling was like water. Lesson learned; I now par-bake pumpkin pie crusts.)


Obviously, it was time for a showdown.


What do I mean by showdown? 2 pumpkin pies, exact same recipe, one made with canned pumpkin and the other with fresh. I took hem both to work, and let the masses decide if one was better then the other.


I didn't want to use the same recipe, so I looked for a really high ranked one at allrecipes. I picked this recipe because of the rating and also because it was a little different from most, using sweetened condensed milk instead of sugar and evaporated milk. And I am pretty sure it was this one, if not exactly then really close.


1 3/4 cups pumpkin

1 (14 ounce) can Sweetened Condensed Milk

2 large eggs

1 teaspoon ground cinnamon

1/2 teaspoon ground ginger

1/2 teaspoon ground nutmeg

1/2 teaspoon salt

1 (9 inch) pie crust


1. Par - bake 9" pie shell

2. Combine all ingredients. The resulting mixture is completely liquidy

3. Bake for 15 min at 450. Turn heat down to 350 and continue to bake until a knife inserted comes out clean


I also decorated one pie, because I wasn't sure if I would be able to tell them apart. So, with the scraps left over from the bottom crusts I cut out all these little flowers.


Then I used them to decorate the crust edge like this. Its kindof pretty, I am still working on the decorating skills.


The results: again, 2 very good pies. And with par-baking the crust first the bottoms came out perfect.


So what about the showdown? My co-workers were awesome and once they knw what I was doing almost everybody tried both pies. The fresh pumpkin came out a little smoother, I think because I used the fine strainer of my food mill. The canned had a slightly stronger, more condensed flavor. But overall, they came out equal. One person (who have determined to be an outlier) found the fresh pumpkin one to be superior. Everyone else thought they were pretty much the same.


So canned pumpkin it is (at least for me). Because, seriously, there's no reason to work that hard if it doesn't taste better.